Showing posts with label centerpiece. Show all posts

Sunday, January 12, 2014

Candy Cane and Washi Tape Valentine Centerpieces


Does anyone else ever forget that they purchased candy canes at Christmas time, only to find them all as soon as Christmas is over? Ooops! If  I had a nickel for every candy cane I threw away after cleaning up decorations...Ergh!!! This year, I was determined to find some way to reuse these delightfully-shaped candies and save them from the dreaded trash can once and for all! Using washi tape, pencils, and my handy, dandy hot glue gun, I was able to transform those bad boys into pieces for a cute, Valentine's day centerpiece that is now proudly displayed in my home. Check out how below:
Materials:
-candy canes (I used 6 to create 3 hearts)
-washi tape
-unsharpened pencils
-glue gun and glue sticks


Directions:

1. Place two candy canes together to create a heart shape. Wrap the candy canes together and both ends using washi tape.
2. Wrap washi tape around the candy canes, covering them competely
3. Place hot glue at the bottom of the heart and adhere the eraser end of a pencil. Let dry
4. Wrap the pencil with washi tape
5. After heart sticks are completed, arrange them in a vase with conversation hearts for super cute V-day decorating!

Thursday, November 7, 2013

Mickey Mouse Clubhouse Birthday-Part 2


Many of you may have already seen the ideas posted from my niece's Mickey Mouse Clubhouse-themed party. If not, check them out HERE!

As it turns out, my nephew Royce is a HUGE MMCH fan, himself (just like every other child in America), so he had himself a similarly-themed party. Here are some pics of the awesome party and the super-cute birthday boy, himself. This party even featured an appearance from the big mouse himself! Check it out...


The adorable birthday boy in his Mickey-eared party hat


Wooden clubhouse sign, made by my bro-in-law leading party-goers to their destination


Mickey centerpieces


Favor bags for the attending kiddos


How unbelievably cute is this Mickey cake my sister made using 6 round cakes and two cupcakes?!?!


Hot dog table and fixins displayed in Mickey bowls
Royce being introduced to Mickey...he wasn't the biggest fan of him in person, but was sooo excited Mickey came to his party after it was all said and done

Family pic with Mickey (love Royce's face in this one, haha!)


Tuesday, August 27, 2013

Garfield party decorations

As promised, here are some highlights of my Aunt Rene's 50th birthday party. I mentioned in my post from last week that Rene is a HUGE Garfield fan but had a lot of difficulty finding Garfield decorations..Enter her craft nerd niece (aka-ME)! Here are some pics from the party and of the birthday girl herself.
50 looks good on this girl!
Garfield buckets-made from orange sand pails, felt and hot glue and used for MANY different purposes, like centerpieces...
and cake pop holders...
and wine buckets!!!
Centerpiece, candles and Garfield message book for all of the party peeps to sign
This circular placemat was found at my local dollar store and, with a little craft foam, became more decor for the birthday girl!

Pool noodle Garfield wreath-instructions can be found HERE!


Wednesday, April 24, 2013

Rustic Tree Trunk Candle Holder


tree, trunk, candle holder, rustic, centerpiece, vase, wood
The gorgeous tablescape
 

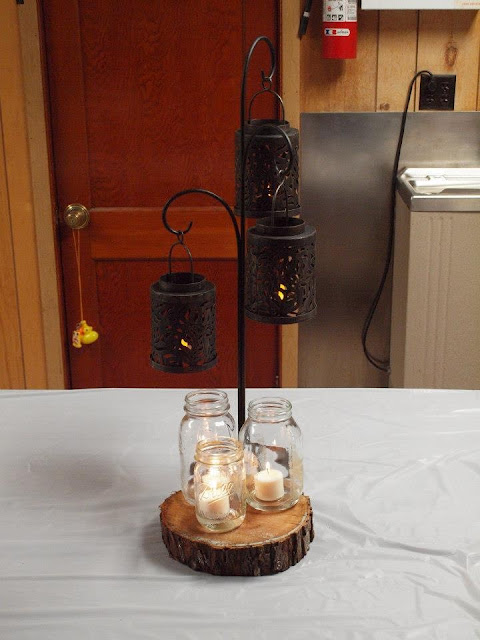
When I attended my cousin Sarah's 30th birthday party in February, I had no doubt I could count on three things: good music, good food, and good people. Little did I know that my aunt and uncle would also throw in some awesomely crafty centerpieces and decor, as well! They went above and beyond to set up the tables at the party. For the center of the centerpiece, My uncle, Kevin cut each of the logs and branches out himself and hollowed out each of their tops large enough to fit a tealight. Using logs of three different lengths, my aunt, Rita adhered them together with a very strong epoxy and tied brown and green twine around them. Thankfully, she allowed me to take one home with me, as I fear I would've snatched one up with or without permission! As if that wasn't enough, Kevin also cut holes into smaller pieces of log to turn them into faux flower vases (I also currently own one of these in my household...thanks, Uncle Kev!). Rita also used white, cupcake liners (and lots of 'em) to create the adorable bouquets that sat atop glass bowls and battery-operated tealights. The party was a wonderful time, and the birthday girl made 30 look good; however, now the pressure is on for all future parties to come. Can't wait to see what kind of creation they hold...


tree, trunk, candle holder, rustic, centerpiece, vase, wood
Another view of the decor


tree, trunk, candle, candle holder, centerpiece, rustic
Centerpiece for the gift table


tree, trunk, candle holder, rustic, centerpiece, vase, wood
The yummy and super-creative appetizer table


Thursday, June 7, 2012

Showered with Love (and Creativity)

I am including some pictures from one of my fantastic baby showers, hosted by my mom, @Jane Beaver, sister, @Kyra Tanner, sister-in-law, @Tiffany Beaver, and best friend, @ Tammie Gloss! These ladies put so much time and creativity into planning a fabulously handmade shower, and I could not have been more appreciative and honored. Claire and I are VERY lucky girls!!!


A view of the adorable shower tables, based on my nursery theme of birds and trees, fashioned by my awesomely creative mom, @Jane Beaver and sister, @Kyra Tanner

Favors were bags of delicious popcorn and labeled "Ready to Pop" Adorbs!!!

A view of the delicious popcorn-kettle corn drizzled with white (in this case, pink) and milk chocolate. Mmmm!!!

How cool is this? A cupcake tree made by the fabulous @Tiffany Beaver

Owl cookies made by my amazing BBFF (that would be "Baker Best Friend Forever") @Tammie Gloss

Tam also fashioned this AWESOME Elmo fruit tray (Elmo is my absolute favorite character from childhood and, let's be honest, adulthood, too)!

One of the shower games encouraged guests to cut apart pictures of my husband, Jason and myself and glue together what our child might look like using our "best features". Yikes! Let's hope life does not imitate art, because the "child" on the right is definitely rocking a MULLET!

More views of Baby Eyer...poor kid!

Another shower activity encouraged each guest to write a message on a puzzle piece, which eventually formed a large bird to be proudly displayed in baby's nursery. @Tiffany Beaver cut out the bird outline and each of the puzzle pieces using pink foam core and an Exacto knife! How amazing is she?!?!


Beautiful pram cover made by my Grandma Dalby, the original crafter of our family!


Very Hungry Caterpillar (one of my favorite children's books)-themed knitted hat and peapod, created by my fabulous aunt, @Patricia Beaver. Is this not the coolest thing you've ever seen?!?!?! Man, I love creative people!


Another amazing example of creativity! My cousin, @ Kristin Pastva created these awesome baby leggings by sewing together two, adult socks! If this baby is not the most fashion-forward chick in all of Pittsburgh, I'm not sure who is! Did I mention creative people are the best?!?!


Friday, September 16, 2011

Flower Pen Centerpiece/Favors


Looking for some “not your average centerpiece” centerpieces? I created these flower pen bouquets for a bridal shower, not only to serve as cute décor, but also to assist guests in participating in shower games, as each flower is actually a functional pen. Simply wrap floral tape around each pen from just above the pen point to the top so that it is completely covered. Next, take the tops of fake flowers off of their stems and use hot glue to adhere them to the top of each taped pen. Cut a piece floral foam to fit the container that will be holding the pens and place it into the container (I used some really cute, filigreed, bright green Chinese takeout boxes for these particular centerpieces!). The pens can then be stuck into the floral foam and arranged into an adorable centerpiece!


Thursday, July 28, 2011

Blossoming Tree Centerpiece


I am all about designing on a dime, so I decided to borrow from the bounty of free items Mother Nature has to offer. Using a square vase that I have had forever, I filled it with a variety of “river rocks” (that I couldn’t find in nature, so I bought from a dollar store) and placed three of my favorite branches found outside into the vase. To make the flowers, I used five sheets of tissue paper that I folded like a fan and cut into 4” pieces (for smaller flowers). I used jewelry wire to wrap around the center of each tissue paper fan, leaving a tail of wire to be used later. Carefully pull each layer of tissue paper toward the wire in the center on one side and do the same to the opposite side. Once your flower is completed to your satisfaction, use the wire to twist around any part of the branch you would prefer. Repeat this process until your “tree” is decorated the way you want.
In case you’re as much of a visual learner as I am, here is a link showing how to make a variation of tissue paper flowers somewhat like mine. http://www.wikihow.com/Make-Tissue-Paper-Flowers